

Preparing a Windows Image for OSD
Introduction
Section titled “Introduction”A simple overview of the steps involved in preparing a Windows Operation System Image for use in CapaInstaller Operating System Deployment
Prepare
Section titled “Prepare”Prepare the deployment server for Image configuration and capturing
- Download and Install the Windows Windows Assessment and Deployment Kit → Windows Assessment & Deployment Toolkit
- Create a WinPE boot image → How to Create a boot image
- Install a clean version of Windows on a bare metal reference computer or a virtual machine.
Generalize
Section titled “Generalize”Generalize the reference computer to prepare the image for duplication.
-
Run the SysPrep command located in C:\Windows\System32\Sysprep
Sysprep.exe /quiet /generalize /oobe /shutdown
How to Generalize a Windows installation
Capture & Add
Section titled “Capture & Add”Capturing and adding an image into CapaInstaller OSD
- Boot the reference computer and immediately press F12 to enter boot selection menu. Choose to boot from the network (PXE)
- Wait for the CapaInstaller boot image to load
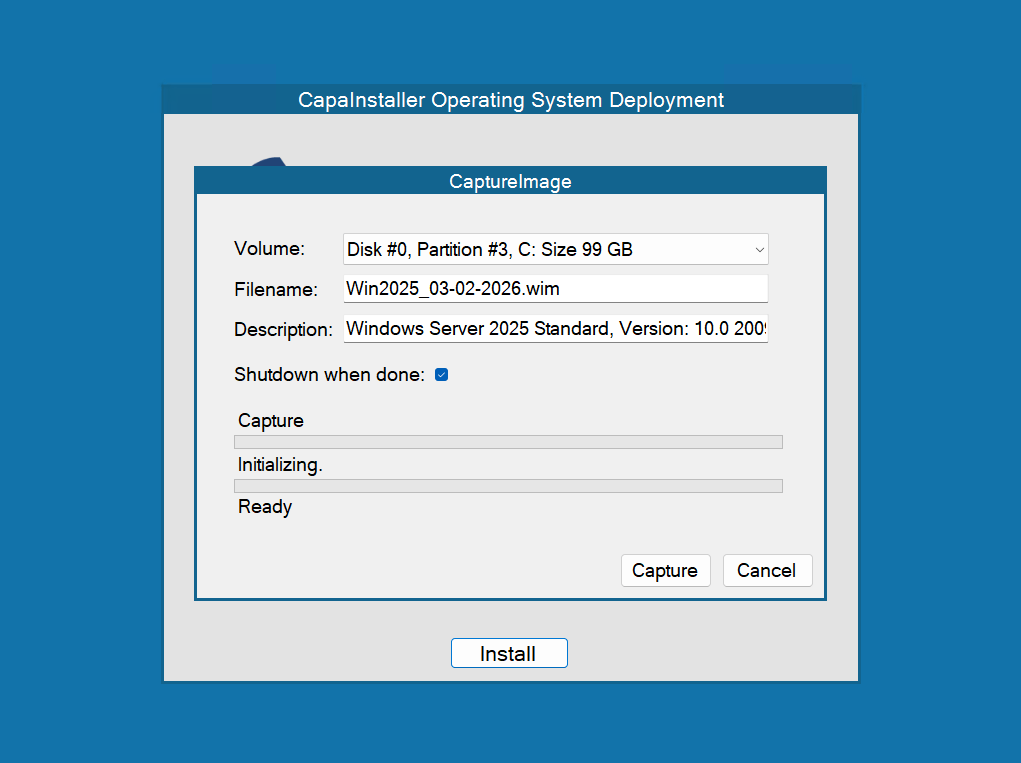
- At the Install screen press CTRL-C to enter Capture Mode
- Make sure the volume is the C:
- Name the capture file
- Begin the Capture and wait for the capture to complete and upload to the CapaInstaller server

- When the Capture is complete add the image in OSD → How to Add Images
Configure
Section titled “Configure”Use functions from OSD Scripting Library to configure settings in the Windows Deployment answer files
- Create a Windows/Panther folder in the Image folder on the relevant OSD Point → <osdpoint>**\Images\<Imagename>\Windows\Panther**
- Create a vanilla unattend.xml from the template below and place it in the new folder
- Create a new script with the needed configuration functions
Click here to expand unattend.xml template
Read more