Certificate handling in CapaInstaller
Introduction
Section titled “Introduction”Before CapaInstaller Mobile Device Management is ready to communicate with 3. party mobile providers it’s necessary to protect the data sent back and forth by the use of signed certificates.
This guide explains in a few simple steps how to secure your communications with Transport Layer Security and an Apple Push certificate.
Read More
Section titled “Read More”Request a TLS certificate
Section titled “Request a TLS certificate”To secure your MDM communication you need a certificate issued to the domain where the MDM server resides.
In the case that there is no certificate associated with the domain where the MDM server a Certificate request to a trusted certificate authority provider should be initiated before proceeding.
As this can take some time, this should be done in due time before implementing MDM in your system.
New Apple Push Certificate Service
Section titled “New Apple Push Certificate Service”| Step | Action |
|---|---|
| 1 | In the “System Administration” menu “Actions”, you will find the “Apple Push Certificate request..” 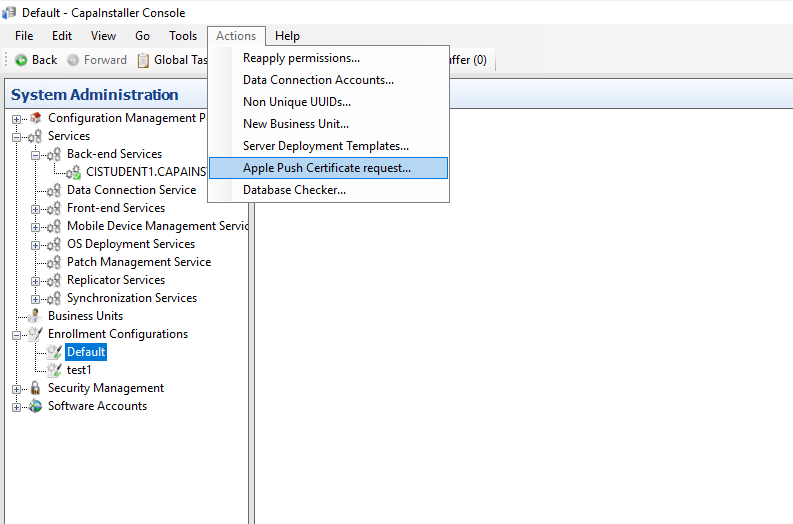 |
| 2 | Wizard starts, press the “Next” button to proceed 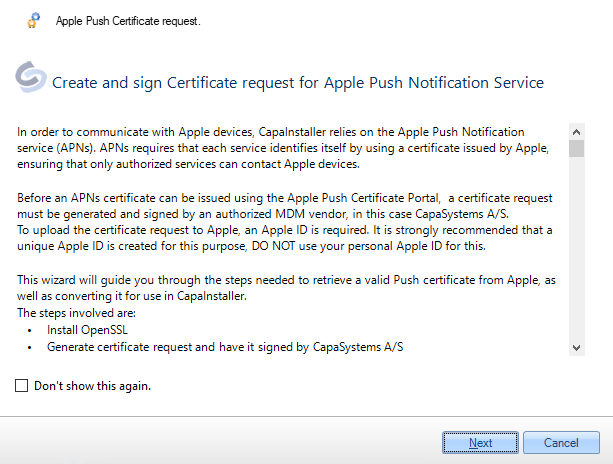 |
| 3 | If the “Verify OpenSSL” isn’t status Passed go to OpenSSL If the “Verify access to Capainstaller certificate request signing service” isn’t status passed you must: First, try to open a browser on the machine from which you run this wizard. Open the following URL: http://certservice.capainstaller.com:7000/status Ensure that port 7000 is opened from the CapaInstaller server out to the internet. The certificate request signing service is placed on a Capainstaller server at port 7000. 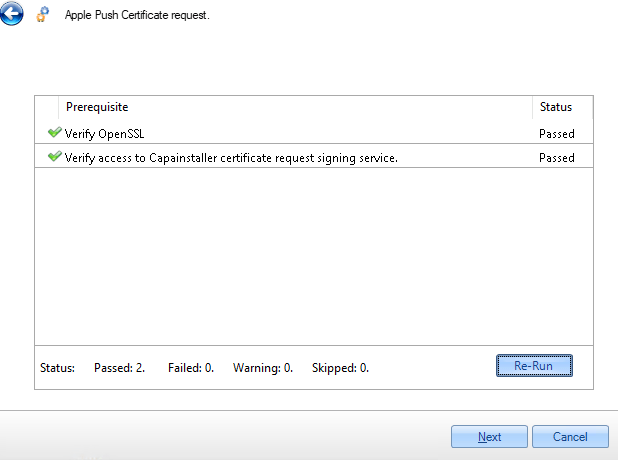 |
| 4 | Select an output folder. Press the “Start” button, and click “Next” when the certificate request is finished 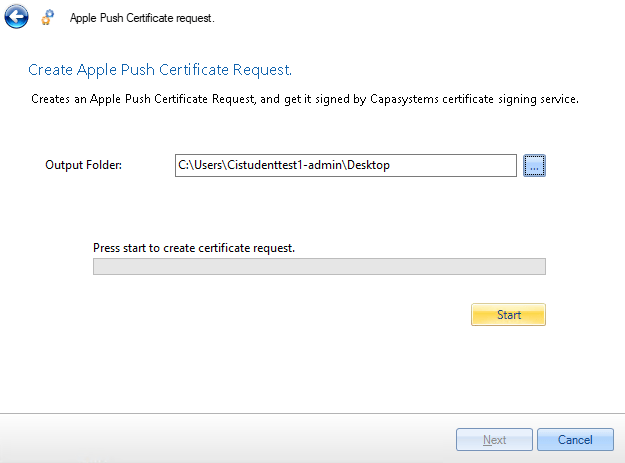 |
| 5 | Now you have created the certificate request which has been signed by CapaSystems and stored in the previously selected output folder |
| 6 | Press the “Open Apple Push Certificates Portal” 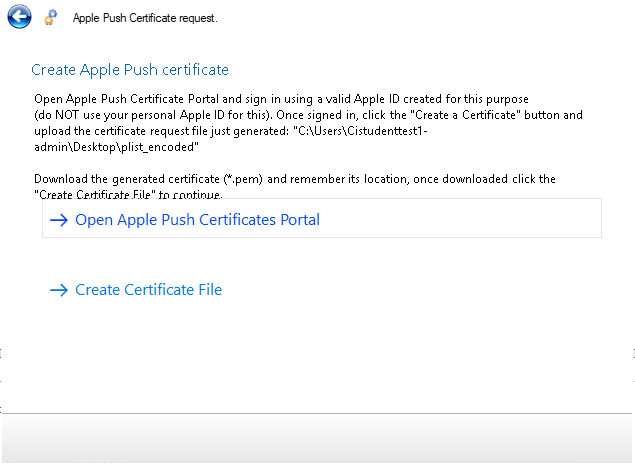 |
| 7 | Login with your Apple Push Certificates Portal account 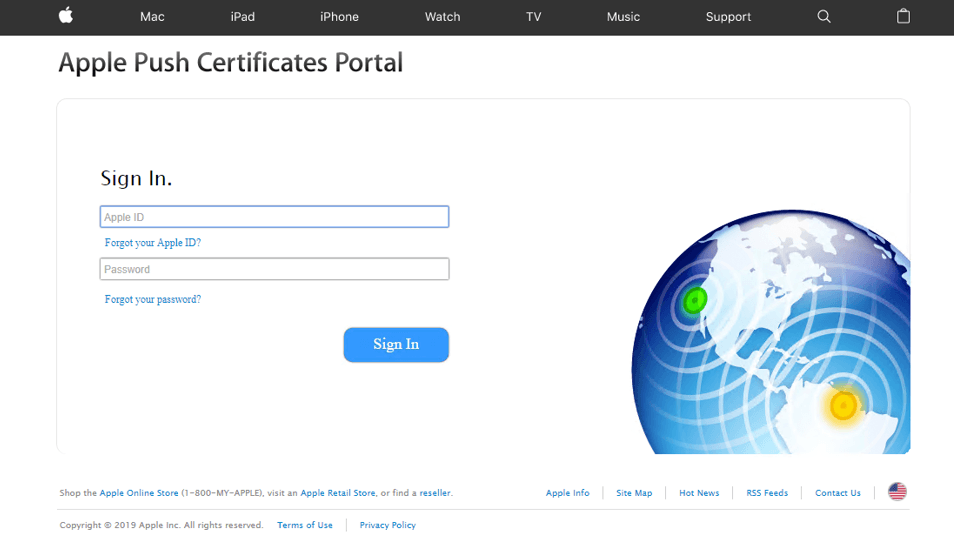 |
| 8 | Press the “Renew” tab 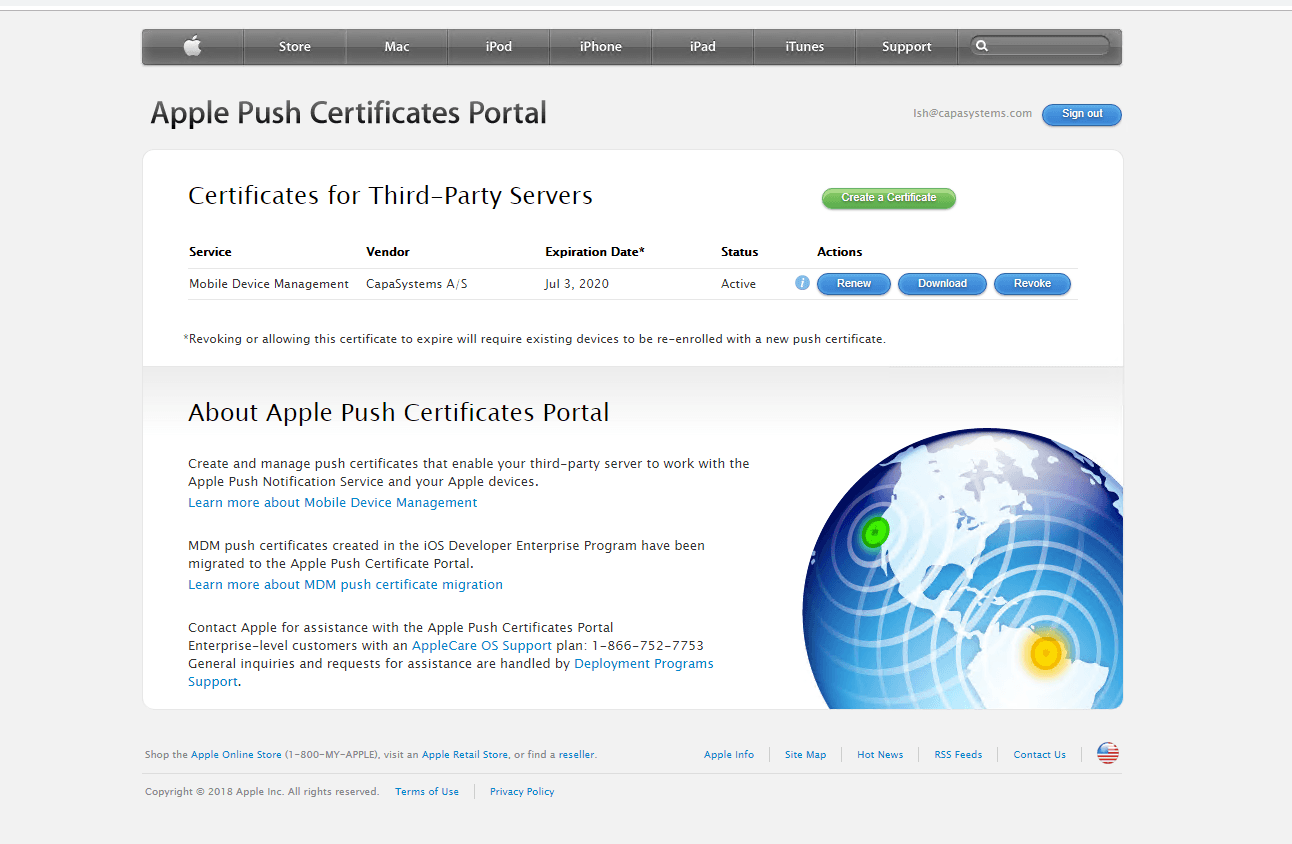 |
| 9 | If this disclaimer appears then just accept it |
| 10 | Press “Choose File” and select the file named: plist_encoded, it is stored in the output directory, and click “upload” 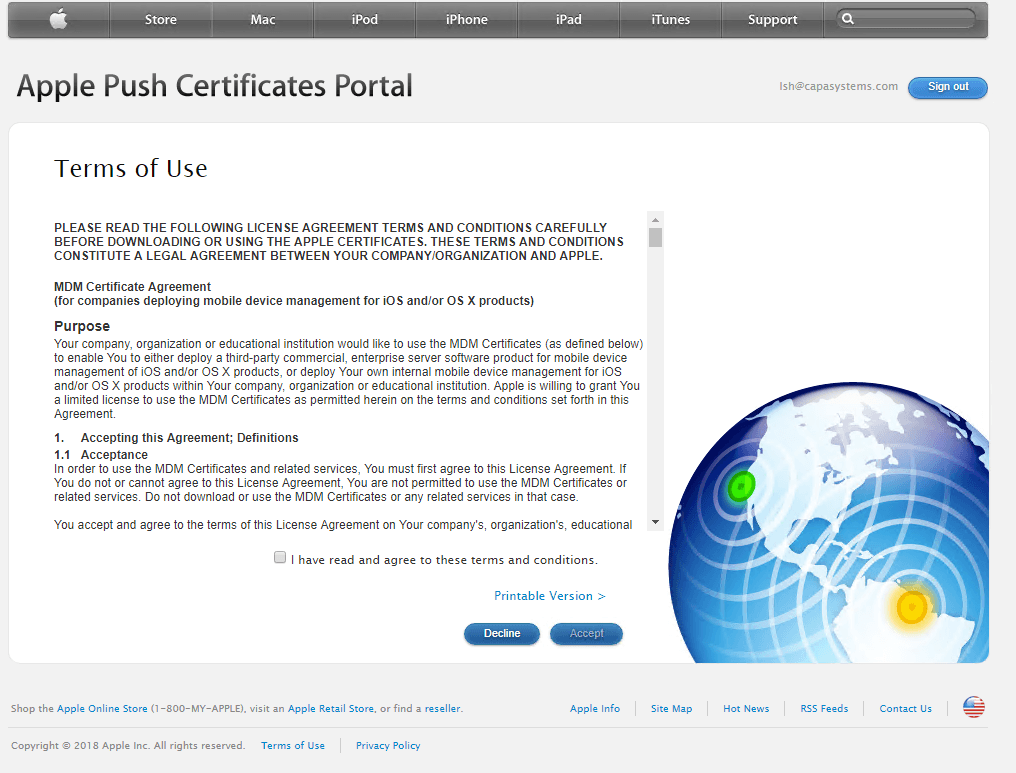 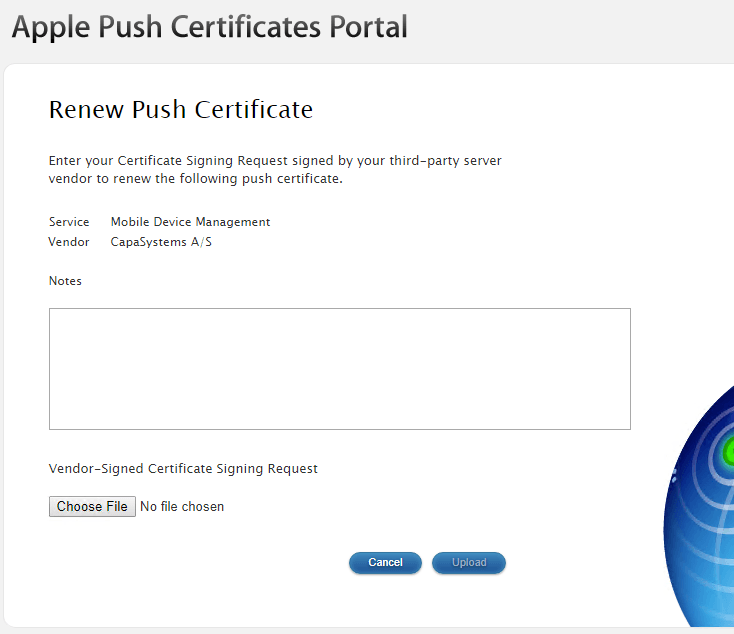 |
| 11 | Now you should get the real certificate as shown in the picture. First, you should open your calendar and insert an alert that will expire a month before the certificate’s expiring date. This will help you recall when to get a new certificate. 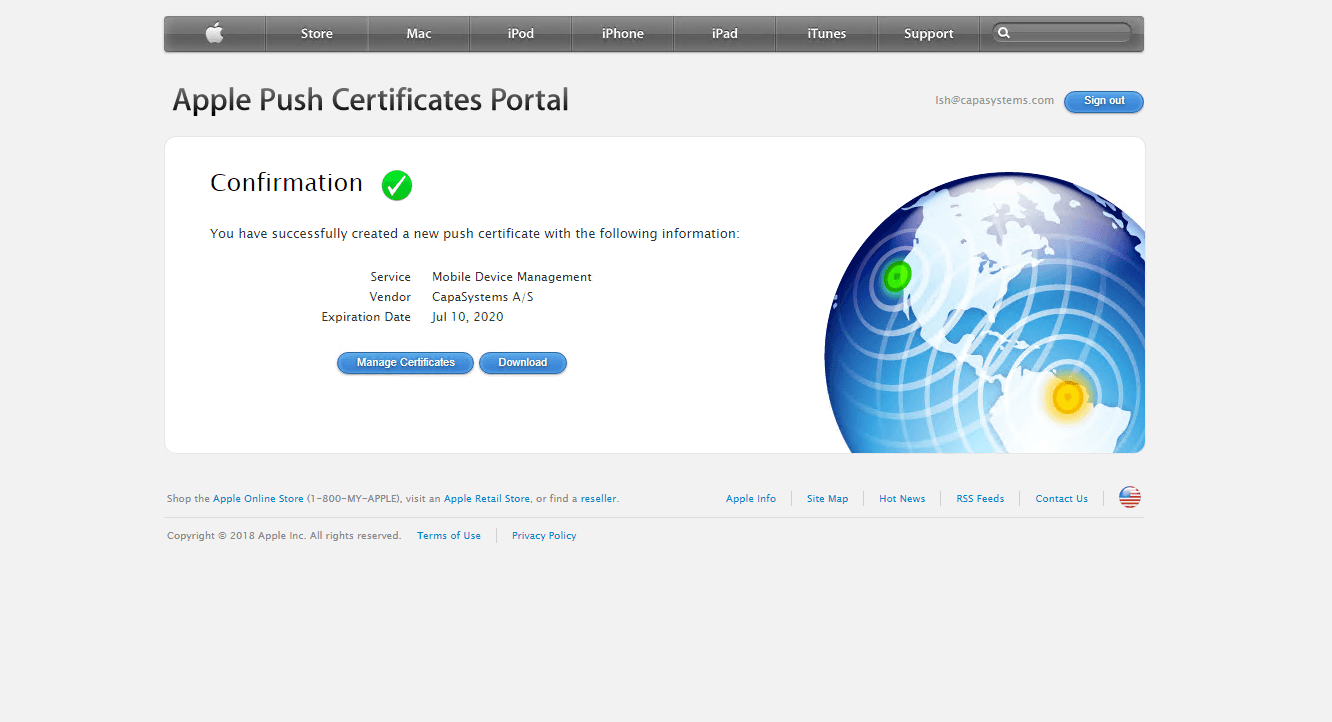 |
| 12738px | You should now press the “Create Certificate File” button in the CapaInstaller certificate Wizard in order to continue certificate issuing process. 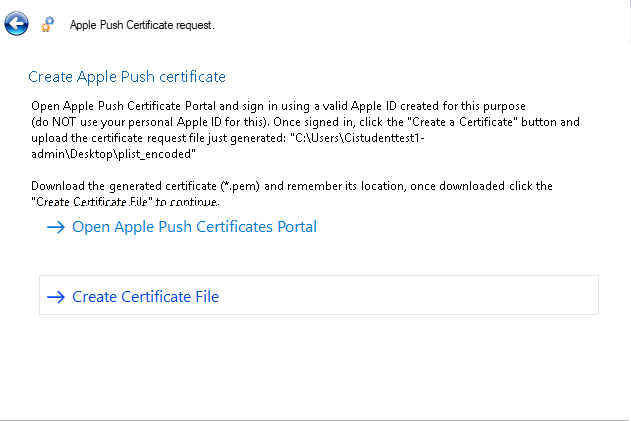 |
| 13 | In the “Apple certificate File” select the certificate downloaded from the Apple push Cert page. (Named: MDM_something.pem) When that is done, press the start tab and then click next 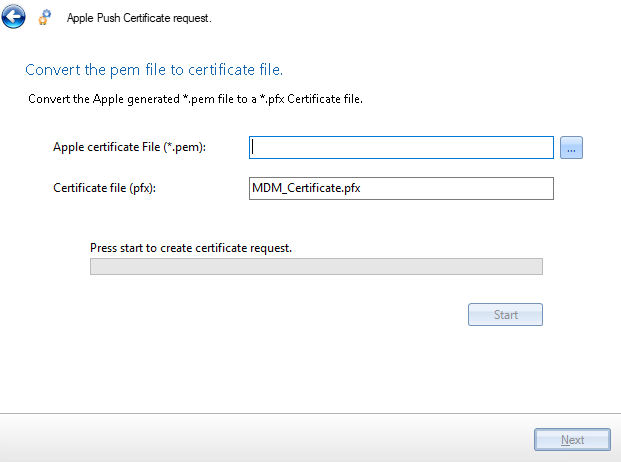 |
| 14 | Now you have the Apple Push Certificate in your output folder (File extension is pfx) 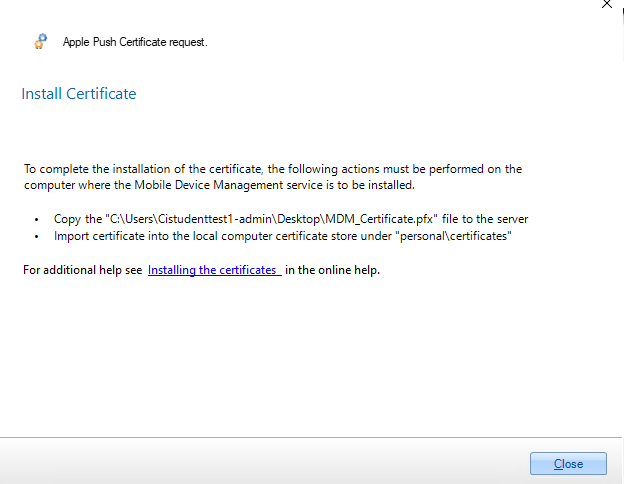 |
| 15 | Now you need to open MMC 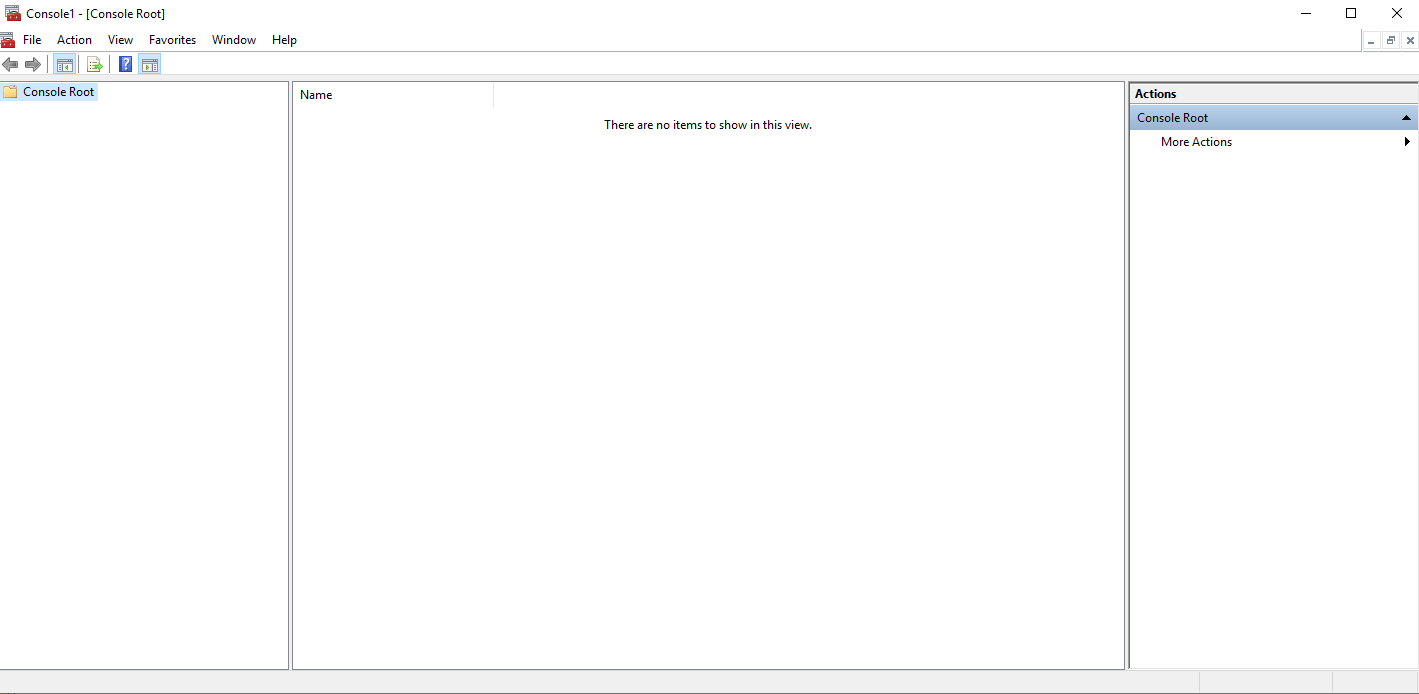 |
| 16 | In MMC, click on → file → Add/remove snap-in… |
| 17 | Click on Certificates, and click Add. 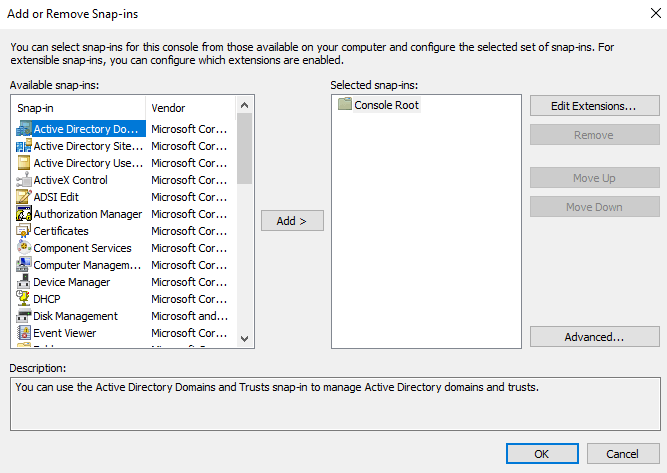 |
| 18 | Click on “Computer account” and click next. 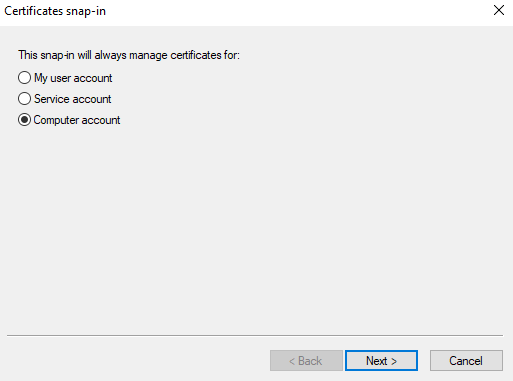 |
| 19 | Now click “Local computer: (the computer this console is running on)” and click finish 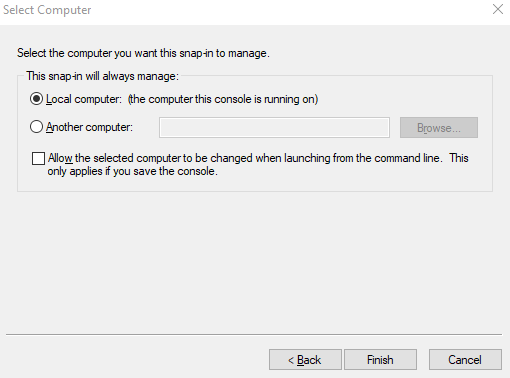 |
| 20 | Click “OK” 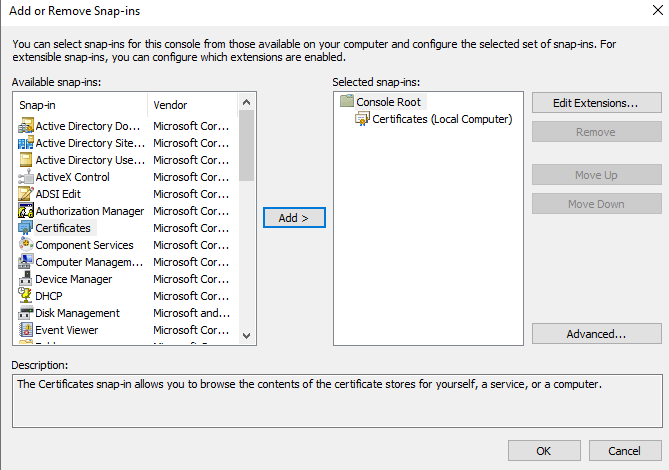 |
| 21 | Now expand Certificates, Right-click “personal” and under “All Tasks” click “Import” 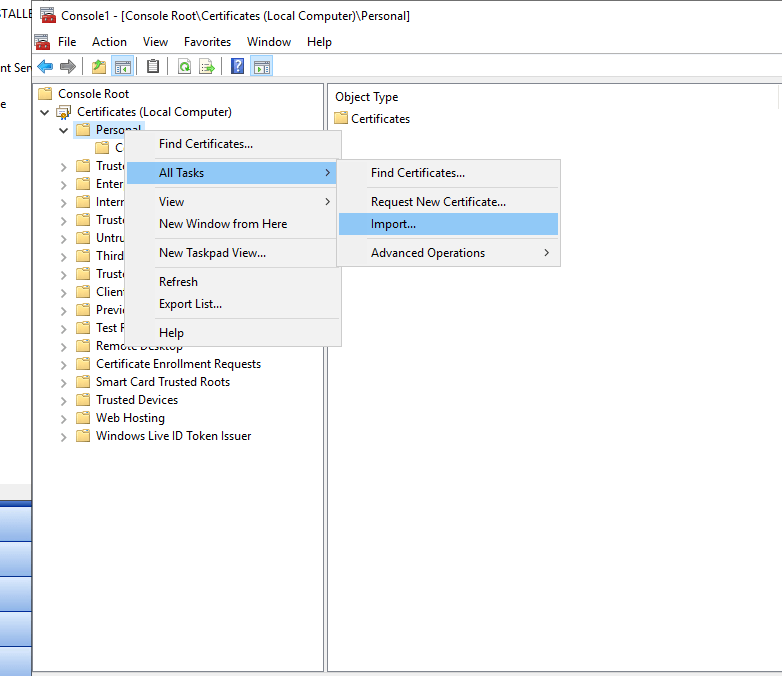 |
| 22 | Click next 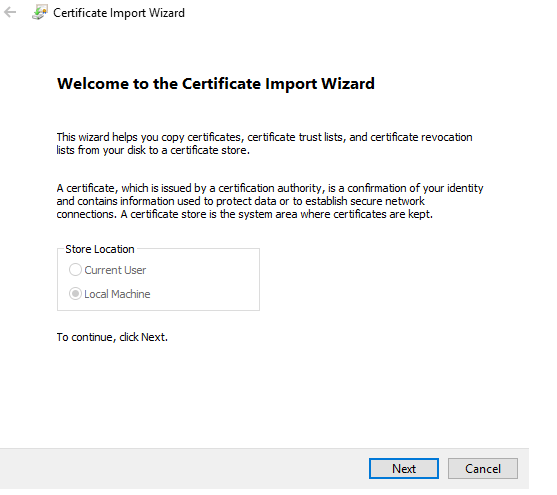 |
| 23 | Browse your certificate now, and click next 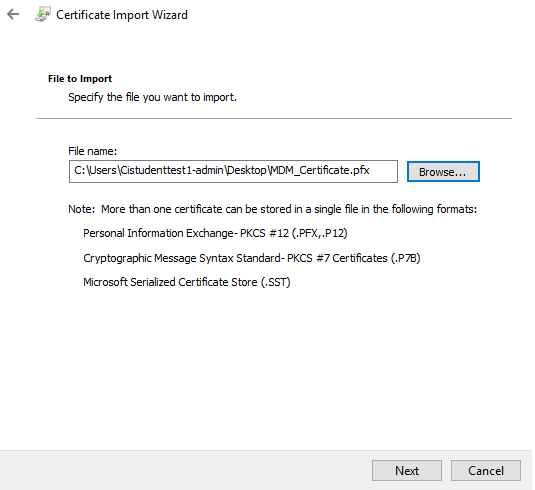 |
| 24 | Click next 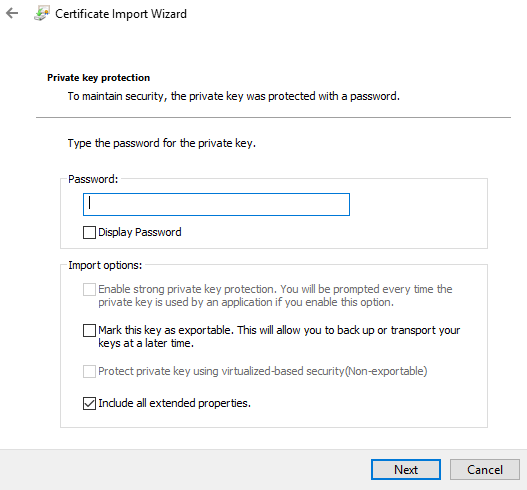 |
| 25 | Click Next 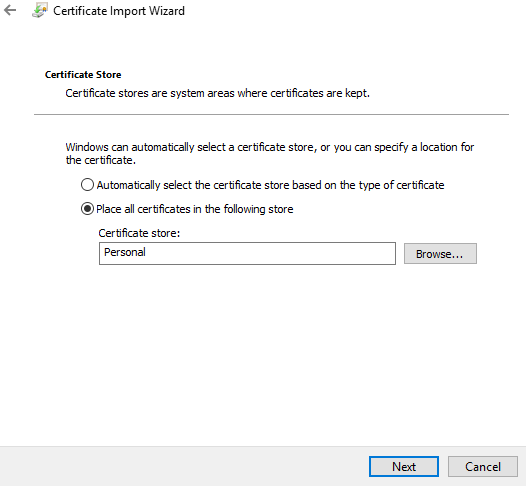 |
| 26 | Click finish 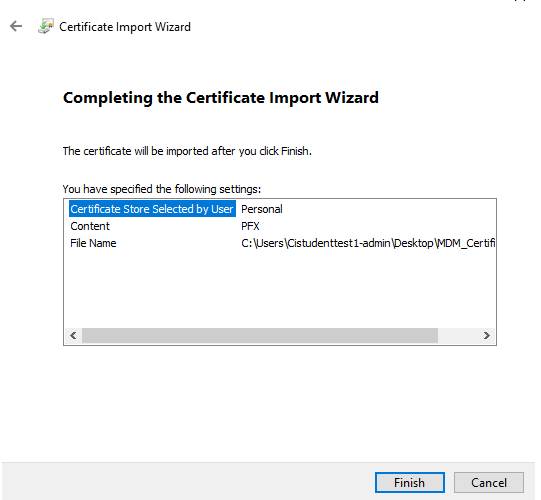 |
| 27 | Now under “certificates”, you can see your renewed Apple Push Certificate  |
| 28 | Now go back to the CI Console → Click on System Administration → Right-click your MDM Service → Click on Service Settings 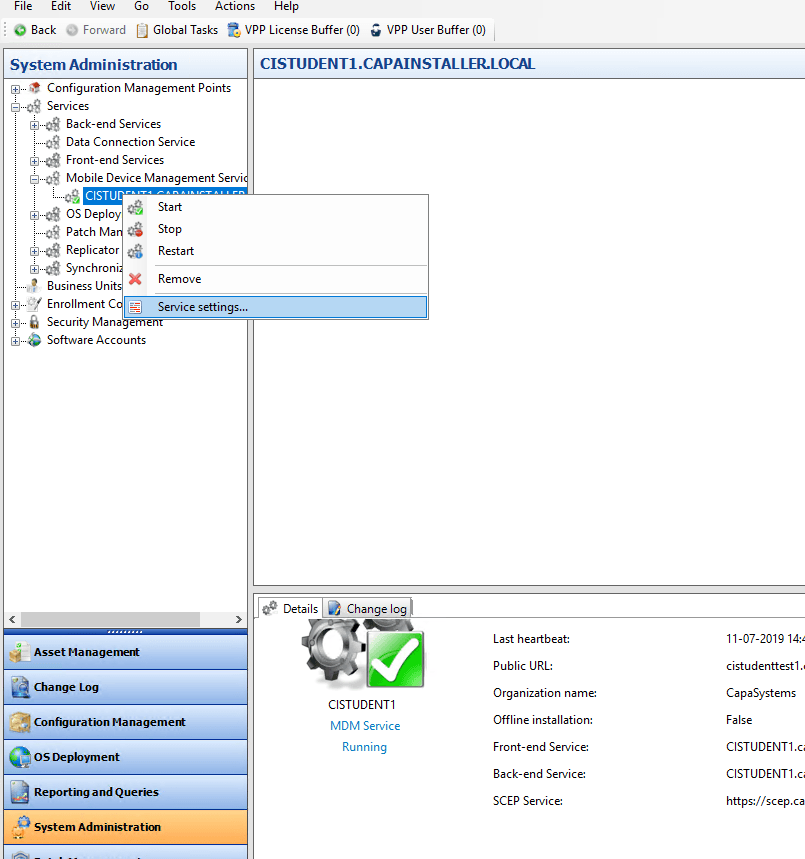 |
| 29 | Under Service settings, click the configuration tab, scroll down to “Apple Push Certificates”, click on the “…”  |
| 30 | Click on the “…” 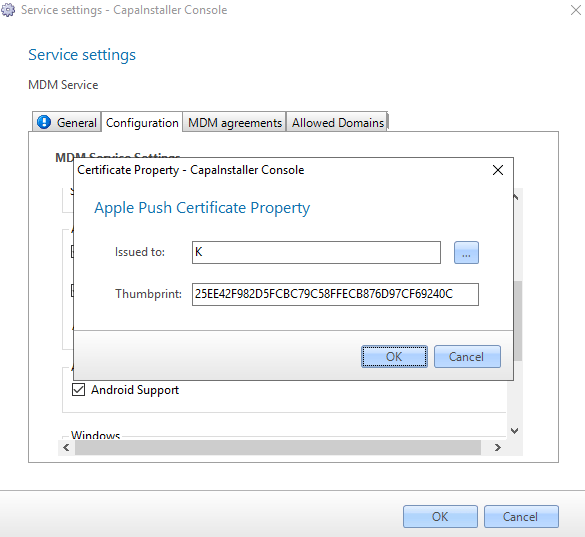 |
| 31 | select the renewed certificate, and click ok 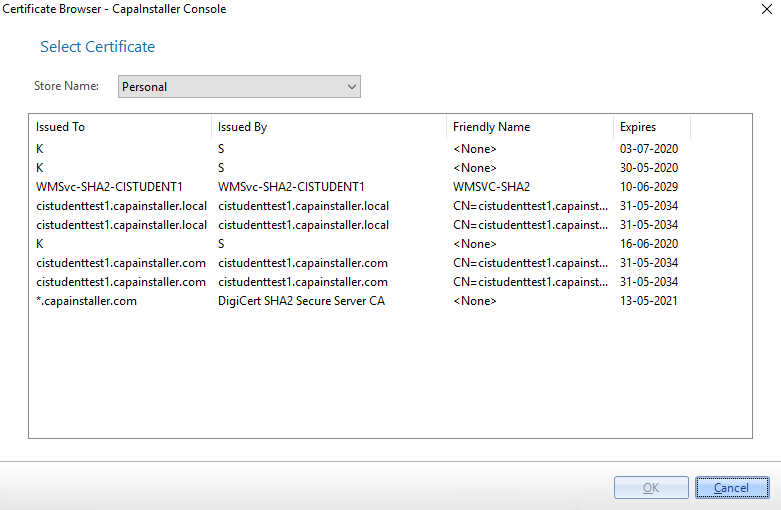 |
| 32 | now open the certificate store by opening run and typing “Certlm.msc” and then press Enter 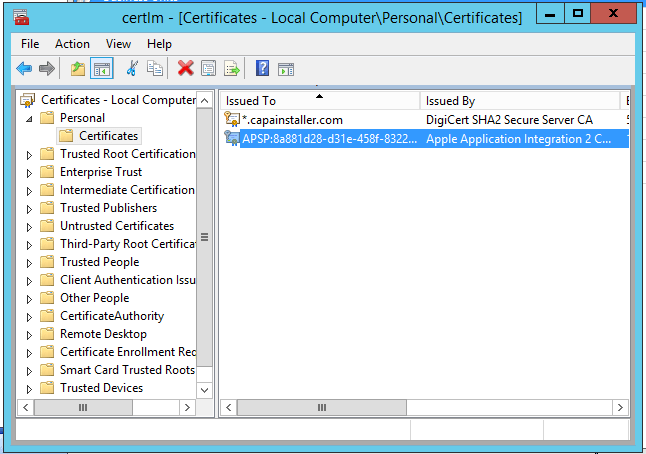 |
| 33 | Right-click the Apple push certificate and click on “open” then go to the “Details” tap and find the “Thumbprint” menu and copy the text in the menu 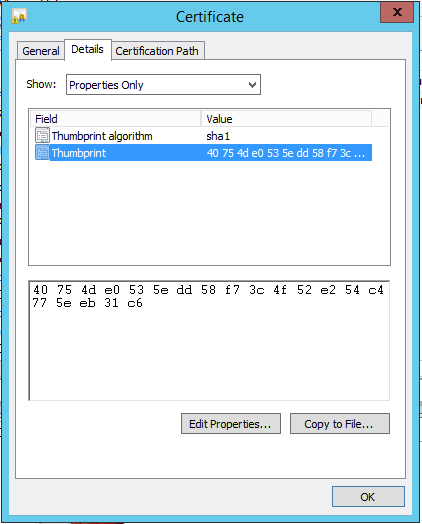 |
| 34 | Paste the copied text under “thumbprint” in the Capa console and click “ok” |
| 35 | Now click ok  |
| 36 | Now restart your MDM Service, and you have renewed your Apple Push Certificate 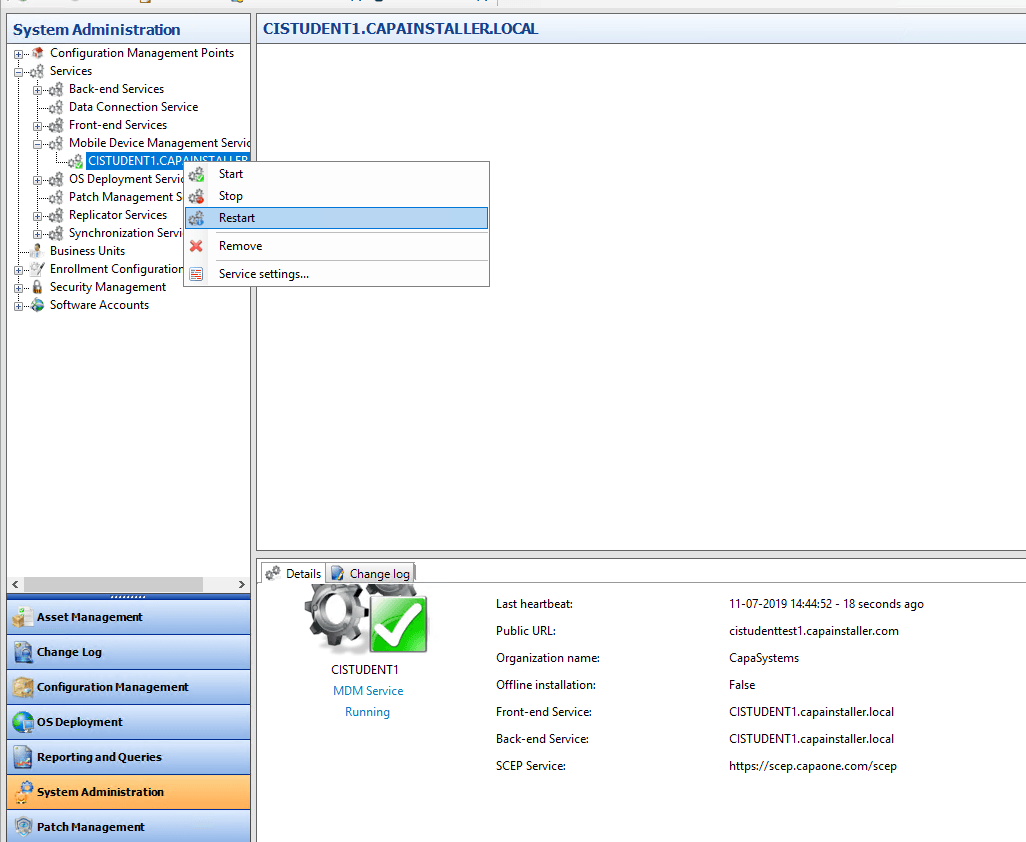 |
| 37 | You made it well done! |
Request and generate or update an Apple Push Certificate
Section titled “Request and generate or update an Apple Push Certificate”| Step | Action |
|---|---|
| 1 | In the “System Administration” menu “Actions”, you will find the “Apple Push Certificate request..” |
| 2 | Wizard starts, press the “Next” button to proceed |
| 3 | If the “Verify OpenSSL” isn’t status Passed go to OpenSSL If the “Verify access to Capainstaller certificate request signing service” isn’t status passed you must: First, try to open a browser on the machine from which you run this wizard. Open the following URL: http://certservice.capainstaller.com:7000/status Ensure that port 7000 is opened from the CapaInstaller server out to the internet. The certificate request signing service is placed on a Capainstaller server at port 7000. |
| 4 | Select an output folder. Press the “Start” button, and click “Next” when the certificate request is finished |
| 5 | Now you have created the certificate request which has been signed by CapaSystems and stored in the previously selected output folder |
| 6 | Press the “Open Apple Push Certificates Portal” |
| 7 | Login with your Apple Push Certificates Portal account |
| 8 | Press the “Renew” tab |
| 9 | If this disclaimer appears then just accept it |
| 10 | Press “Choose File” and select the file named: plist_encoded, it is stored in the output directory, and click “upload” |
| 11 | Now you should get the real certificate as shown in the picture. First, you should open your calendar and insert an alert that will expire a month before the certificate’s expiring date. This will help you recall when to get a new certificate. |
| 12738px | You should now press the “Create Certificate File” button in the CapaInstaller certificate Wizard in order to continue certificate issuing process. |
| 13 | In the “Apple certificate File” select the certificate downloaded from the Apple push Cert page. (Named: MDM_something.pem) When that is done, press the start tab and then click next |
| 14 | Now you have the Apple Push Certificate in your output folder (File extension is pfx) |
| 15 | Now you need to open MMC |
| 16 | In MMC, click on → file → Add/remove snap-in… |
| 17 | Click on Certificates, and click Add. |
| 18 | Click on “Computer account” and click next. |
| 19 | Now click “Local computer: (the computer this console is running on)” and click finish |
| 20 | Click “OK” |
| 21 | Now expand Certificates, Right-click “personal” and under “All Tasks” click “Import” |
| 22 | Click next |
| 23 | Browse your certificate now, and click next |
| 24 | Click next |
| 25 | Click Next |
| 26 | Click finish |
| 27 | Now under “certificates”, you can see your renewed Apple Push Certificate |
| 28 | Now go back to the CI Console → Click on System Administration → Right-click your MDM Service → Click on Service Settings |
| 29 | Under Service settings, click the configuration tab, scroll down to “Apple Push Certificates”, click on the “…” |
| 30 | Click on the “…” |
| 31 | select the renewed certificate, and click ok |
| 32 | now open the certificate store by opening run and typing “Certlm.msc” and then press Enter |
| 33 | Right-click the Apple push certificate and click on “open” then go to the “Details” tap and find the “Thumbprint” menu and copy the text in the menu |
| 34 | Paste the copied text under “thumbprint” in the Capa console and click “ok” |
| 35 | Now click ok |
| 36 | Now restart your MDM Service, and you have renewed your Apple Push Certificate |
| 37 | You made it well done! |
Importing a certificate to the Windows Certificate Store
Section titled “Importing a certificate to the Windows Certificate Store”There are several ways of importing a certificate file to the Windows Certificate Store.
CapaInstaller MDM requires a certificate signed with a private key. This will always be a .pfx file.
When you have generated the .pfx certificate file, follow the below steps to import into the Windows Certificate Store.
For a simple point and click method, follow these steps:
On the computer that the certificate is to be imported to, locate the .pfx file that was exported in the procedure described earlier in this article.
Right-click the file, and then click Install PFX.
When the Certificate Import Wizard starts, click Next.
On the File to Import page, click Next.
On the Password page, type the password for the private key in the Password box, and then click Next.
On the Certificate Store page, click Automatically select the certificate store based on the type of certificate, and then click Next.
Click Finish.
Read more
- Managing Certificates (technet.microsoft.com)
- Import one or more certificates into a certificate store with Powershell (technet.microsoft.com)
- Tools to Create, View, and Manage Certificates (msdn.microsoft.com)
Unlinking previously installed certificates
Section titled “Unlinking previously installed certificates”To check for registered certificates you can open a command console as administrator and run the following command
Check for SSL bindings
netsh http show sslcertThis will give a list of all certificate bindings for ports and certificates. You can now remove the certificate binding for the desired port by running the following command
Remove SSL binding for port 443
netsh http delete sslcert ipport=0.0.0.0:443