

Create a CapaImage
CapaImages are ready-made Windows images that CapaSystems maintains in its image repository. Instead of capturing and preparing an image yourself, you pick the Windows version, edition and language you want in the CapaInstaller Console. The image is then downloaded, unpacked and added to the Images node of your root OS Deployment point, ready to use in OS Deployment.
Use Create CapaImage when you want a standard Windows image. Use Add Windows image… when you have captured your own image. See Images.
Create a CapaImage
Section titled “Create a CapaImage”-
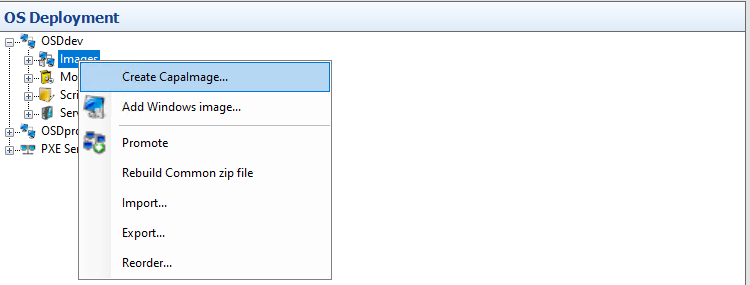
In the OS Deployment tree, expand the root OS Deployment point, right-click Images, and then click Create CapaImage….
-
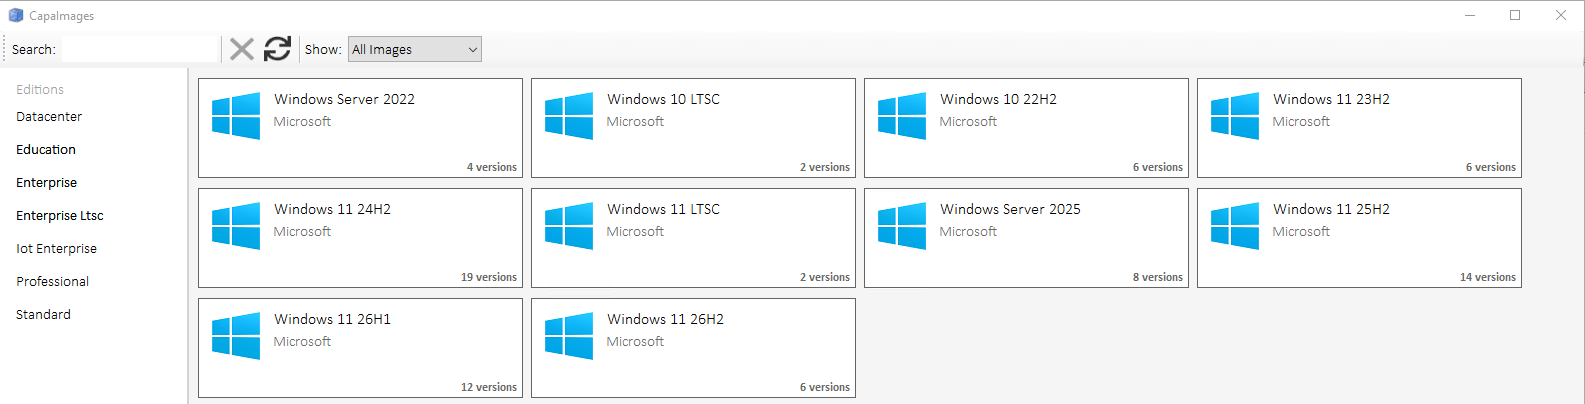
The CapaImages window opens and shows the images that are available in the CapaSystems repository, one tile per Windows release (for example Windows 11 25H2, Windows 11 26H2 or Windows Server 2025). Each tile shows how many versions are available.
- Use Search to find an image by name.
- Use the Editions list on the left (Datacenter, Education, Enterprise, Enterprise Ltsc, Iot Enterprise, Professional, Standard) to show only images with that edition.
- Use Show to filter the list, and the refresh button to reload it from the repository.
-
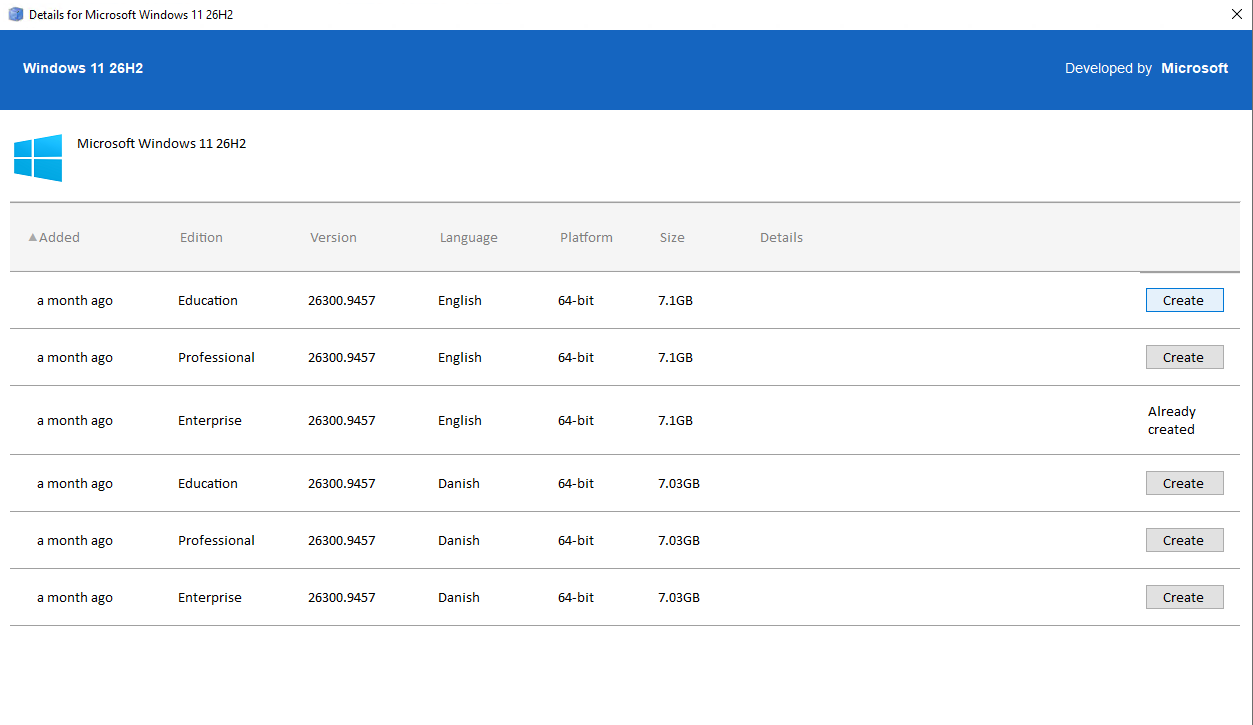
Click the Windows release you want. The Details window lists every available version of that release with the date it was added, Edition, Version (build number), Language, Platform and Size.
-
Click Create on the row with the edition and language you want.
The image is downloaded from CapaSystems and unpacked on the root OS Deployment point. Depending on the size of the image (around 7 GB) and your network and disk speed, this can take a while.
-
When the image is ready, it’s shown under Images on the root OS Deployment point and can be used in OS Deployment like any other image.

Images that already exist on the OS Deployment point are marked Already created in the Details window instead of having a Create button.
After the image is created
Section titled “After the image is created”The image behaves like an image you have added yourself. You can, for example:
- Promote it from the root point to a child point, for example from OSDdev to OSDprod.
- Assign it to OS Deployment servers with Server assignment.
- Export it, delete it or view its properties. See Images.