# OSDClient update preparation
> Prepare for an OSDClient upgrade, including the Windows ADK and Windows PE versions required.
Source: https://docs.capaone.com/capainstaller/installation-and-maintenance/how-to-update/osdclient-update-preparation/
Product: CapaInstaller — a separate CapaSystems product; do not apply this page to any other.
This guide describes the steps required to upgrade to the OSDClient.
## Requirements
Before continuing, observe the OSD software requirements...
**Server**
- Windows ADK for Windows 10, version 2004
- Windows PE add-on for the ADK
**Client**
- BIOS support for PXE 2.1 is required to use PXE boot.
- When using USB devices to boot OSD, make sure the machine BIOS and the USB device are compatible.
- WinPE 2.0 requires that the client has BIOS-level support for ACPI 2.0, and that this feature is
enabled during deployment.
## Enable OSDClient
How to enable the OSDClient to replace OSDGUI...
1. Navigate to the OS Deployment options dialog: select **Tools → Options** in the top menu.
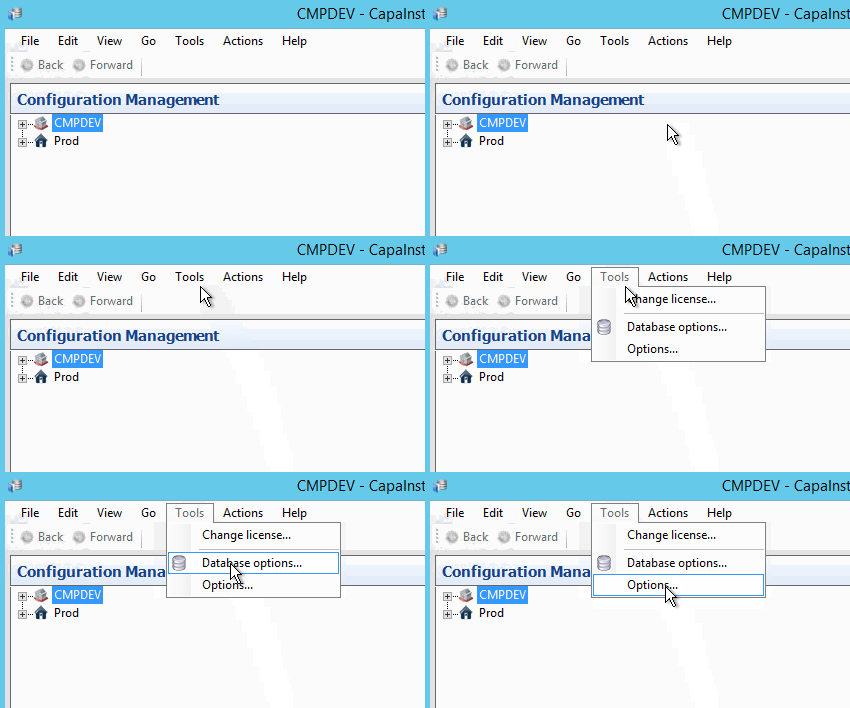
2. Select **Use OSDClient for legacy clients**.
**OS Deployment options**
Detailed description of the configurable options...
- **Mount folder** — the folder to temporarily mount the Windows PE image in when the OS
Deployment Point is configured.
- **Remove folders after unmount** — remove the temporary mount folders after unmount.
- **Use OSDClient for legacy clients** — use OSDClient to handle deployment of legacy clients,
replacing OSDGUI.
- **WAIK or ADK files** — the path to the WAIK and ADK files.
- **ADK files** — the path to the ADK files used for OSDClient boot on UEFI and legacy clients.
- **Administrator** — the user or group that can manage the solution. Specify a domain/AD security
group.
- **Client log folder** — the folder on the backend server that stores client log files.
## Create new boot files for your platforms
How to create a boot image...
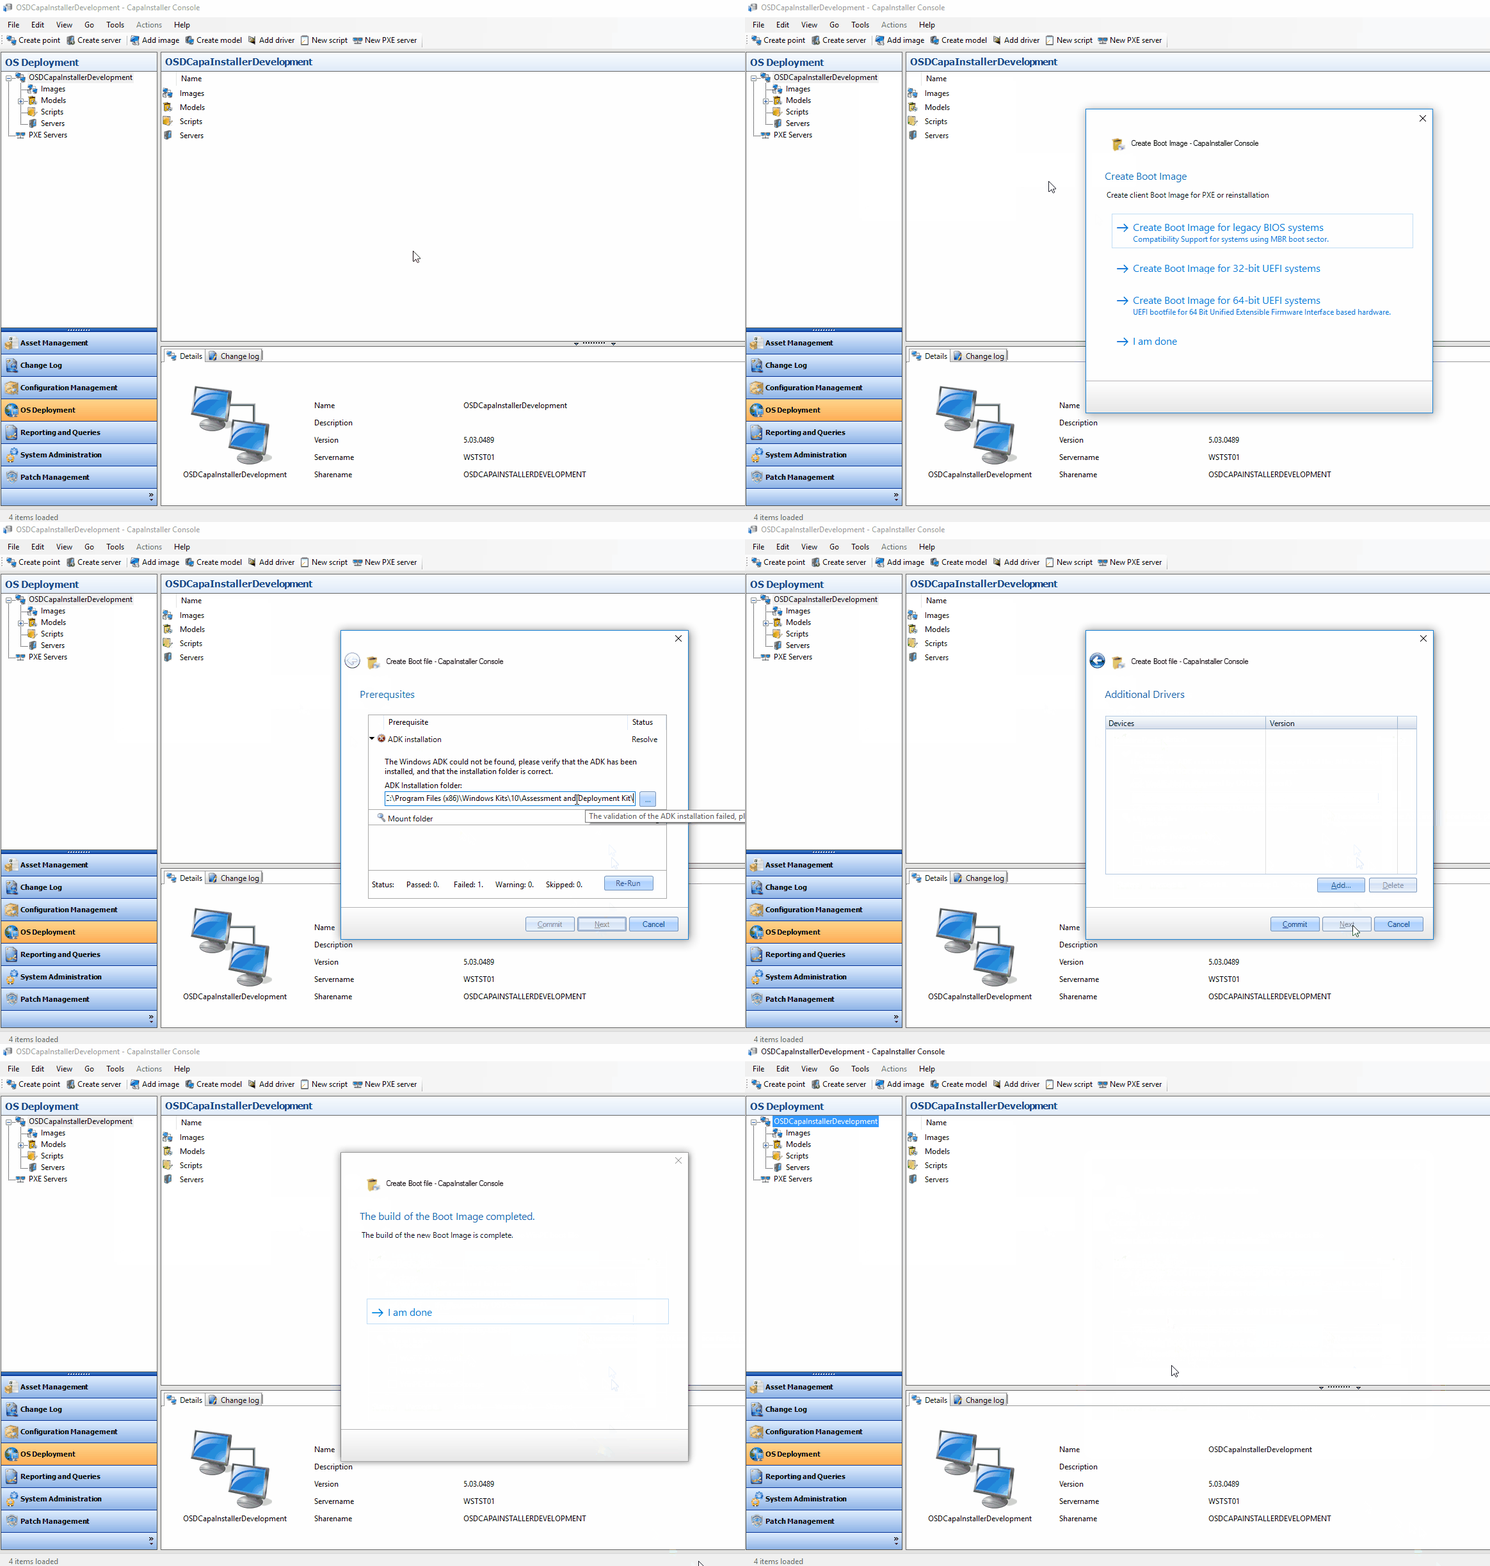
1. Right-click the OSD point and select **Boot Image → Create Boot File...**.
2. Choose **Create Boot Image for 32-bit UEFI systems** or **Create Boot Image for 64-bit UEFI
systems**.
:::caution
- CapaInstaller uses DISM to create UEFI boot images. Find the DISM log file at
`C:\Windows\Logs\DISM\dism.log`.
- Some Windows PE feature packs are required to build a CapaInstaller boot image, and others are
optional — the required packs differ by device type. Read more about WinPE feature packs in the
[Windows PE Optional Components Reference](https://msdn.microsoft.com/en-us/windows/hardware/commercialize/manufacture/desktop/winpe-add-packages--optional-components-reference#bkmk_b).
:::